Documentation
Set up Privatrak, name what matters to you and read every report.
Set up and track a campaign
You’re about to send a newsletter, run an ad or post a link. Afterwards you want to know if it worked. How many visitors did it bring? Did they sign up or buy? This guide sets up tracking for your marketing campaign in six steps, before anyone clicks. It takes about ten minutes, and you don’t need to change your website.
The example in this guide
The Acme Store shop at shop.acme.com sends a spring sale newsletter. The email has two links to the shop: a big button at the top and a text link at the bottom. The shop wants to know how many visitors the newsletter brings and which link they click. It also wants to know how many of them buy. The shop records every finished order as purchase_complete.
Before you start
Privatrak needs to record the result you want to count, such as a purchase. That can be a feature like purchase_complete, or the thank-you page people see afterwards. Features shows how to name one.
1. Plan your tags
A campaign link is your normal link with a few tags at the end. Tags are the extra details that say where the link was placed, and they are also called UTM parameters. Choose them before you build the link, because these are the names you’ll look for in the reports later. Three tags describe every campaign:
- Source: where the link is placed. For the example,
newsletter. - Medium: what kind of link it is. For the example,
email. - Campaign name: the campaign itself. For the example,
spring-sale.
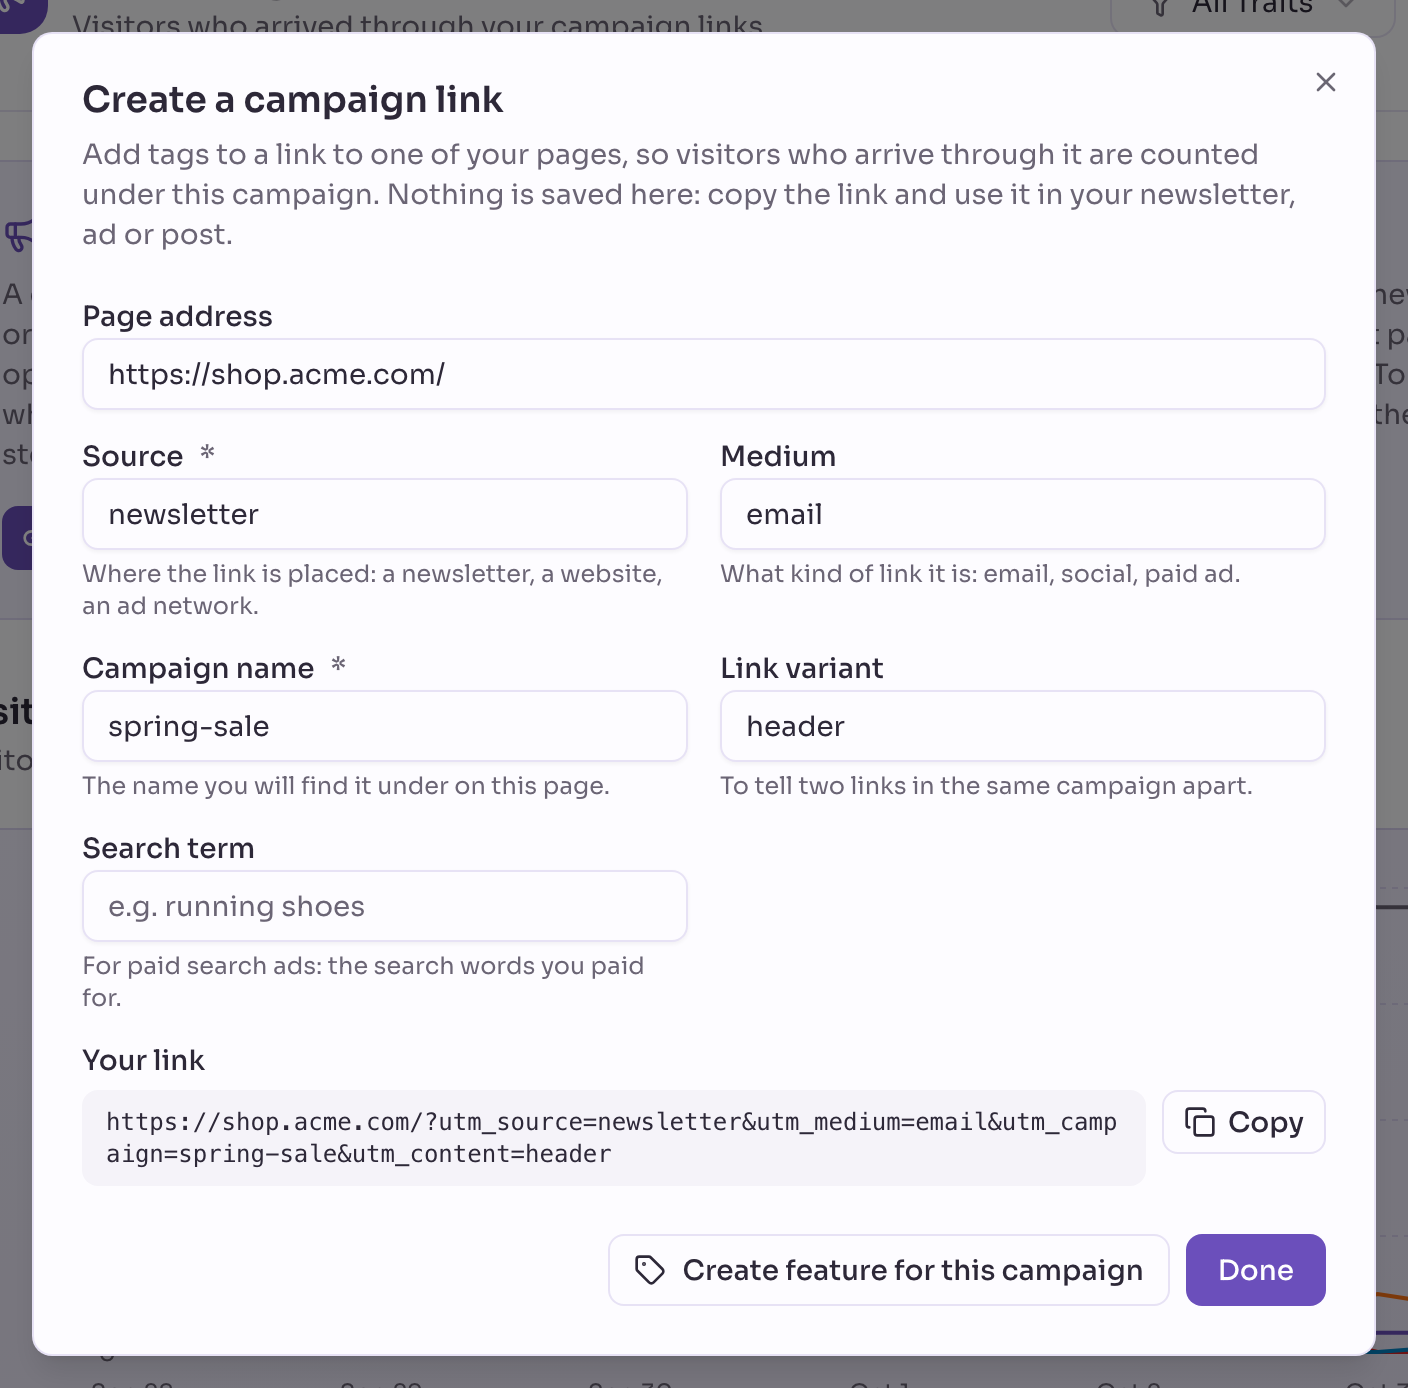
Two more tags are for special cases. Use Link variant when a campaign has several links you want to compare. The example uses header and footer. Use Search term only for paid search ads.
Write every tag in lower case, use dashes instead of spaces, and reuse the names you already have. Campaigns explains the rules for each tag.
2. Build the link
Open Campaigns and click Create campaign link. Under Page address, enter the page visitors should land on. Then fill in the tags from step 1. Source, Medium and Link variant suggest values you already use. Pick from the list instead of typing again.
Watch for warnings under the fields. They appear for spaces, for capitals that would split a campaign, and for pages this project doesn’t count. Fix them before you copy the link.
Your link shows the finished link. Click Copy. For the button at the top in the example, the link is:
https://shop.acme.com/?utm_source=newsletter&utm_medium=email&utm_campaign=spring-sale&utm_content=headerFor the second link, change only Link variant to footer. Then copy again.
3. Create a feature for the campaign
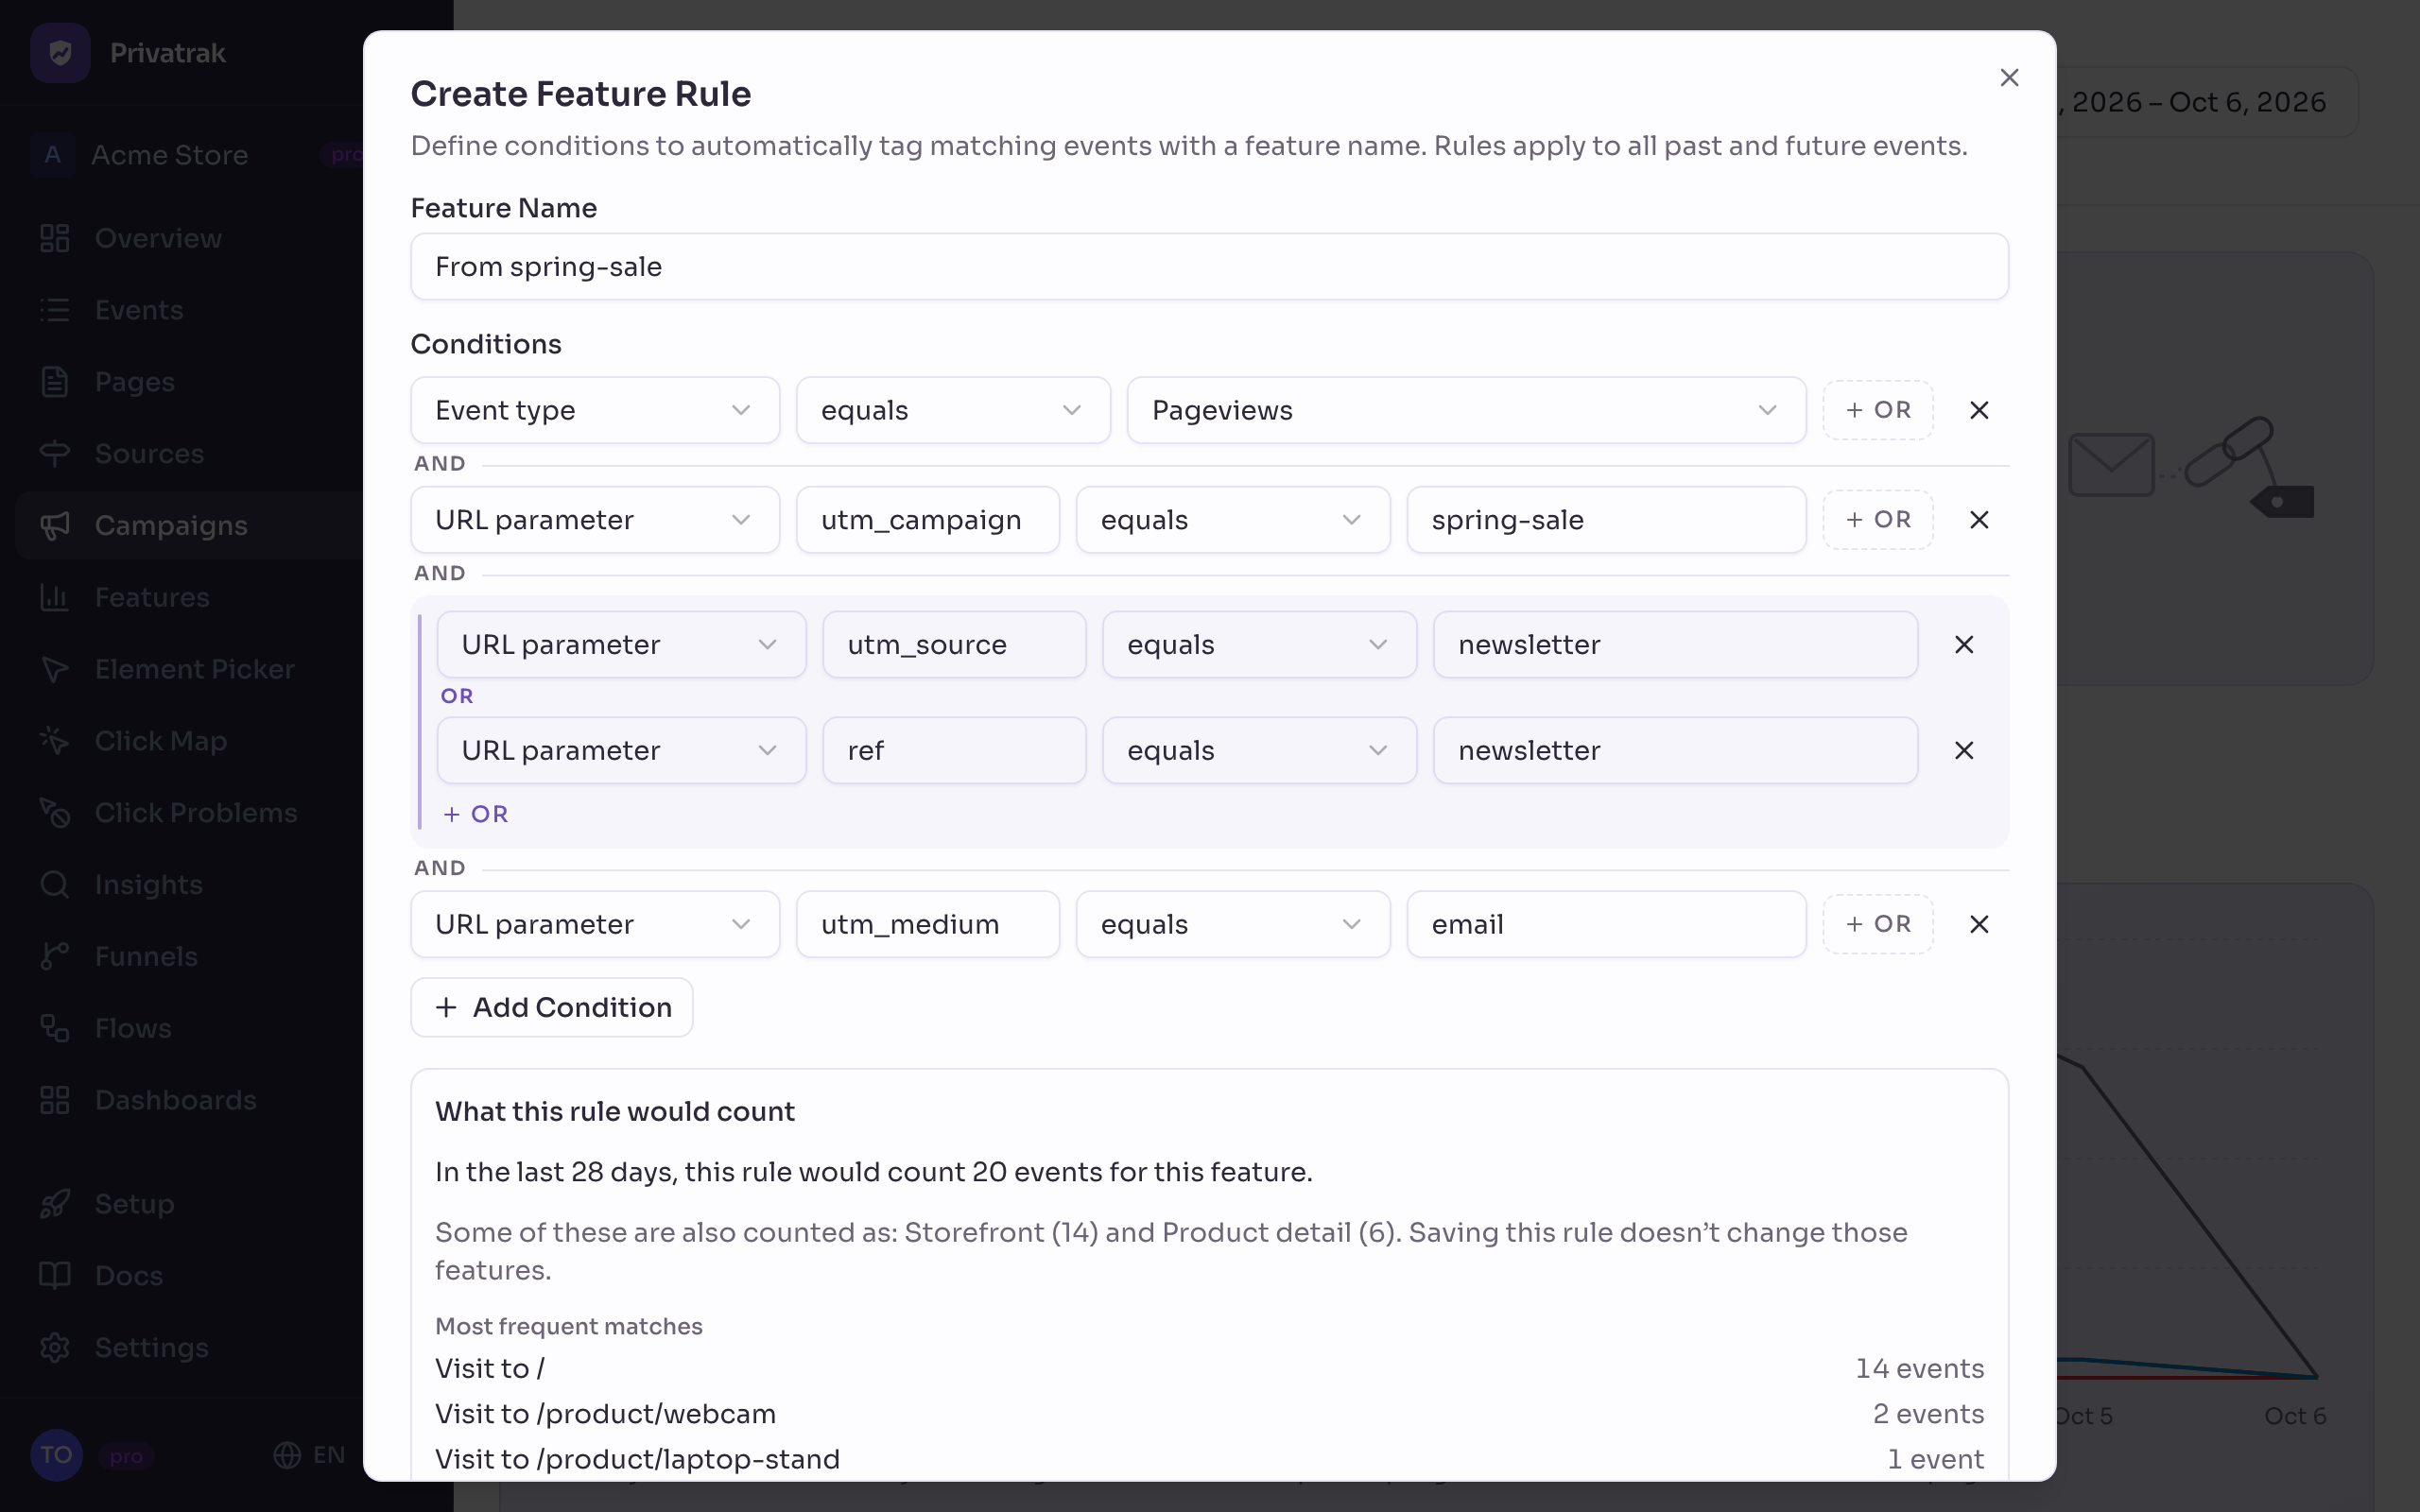
A feature is a name for something people do on your site. Here it names every visit that arrives through your newsletter. In the same form, click Create feature for this campaign. The feature rule form opens with the name From spring-sale and the conditions filled in from your tags.
The rule counts page views whose address has utm_campaign=spring-sale and utm_medium=email. The source newsletter is a pair of alternatives, utm_source or ref, so the feature finds the same visitors as the Campaigns page. The link variant is not part of the rule, so the feature counts both the button at the top and the text link at the bottom. Click Create Rule.
Under What this rule would count, a brand-new campaign shows In the last 28 days, nothing matched these conditions. Check the values above for typos. That is expected, because nobody has clicked the link yet. The shop in the screenshot has run this campaign before, so its preview already finds visits.
4. Build a funnel that starts with the campaign
Do this before you send the newsletter. A funnel counts from the moment you create it, so it only sees the clicks that come after. When funnels start counting has the details.
Open Funnels and click New Funnel. Then:
- Give it a name you’ll recognise, such as
Spring sale newsletter to purchase. - For Step 1, click Add Filter, choose Feature and pick
From spring-sale. - Click Add Step and describe what counts as success. The example shop uses Feature
purchase_complete. If your site shows a thank-you page instead, choose Page path and enter that page. - To see where visitors drop off, add steps in between, such as the cart.
- Click Create Funnel.
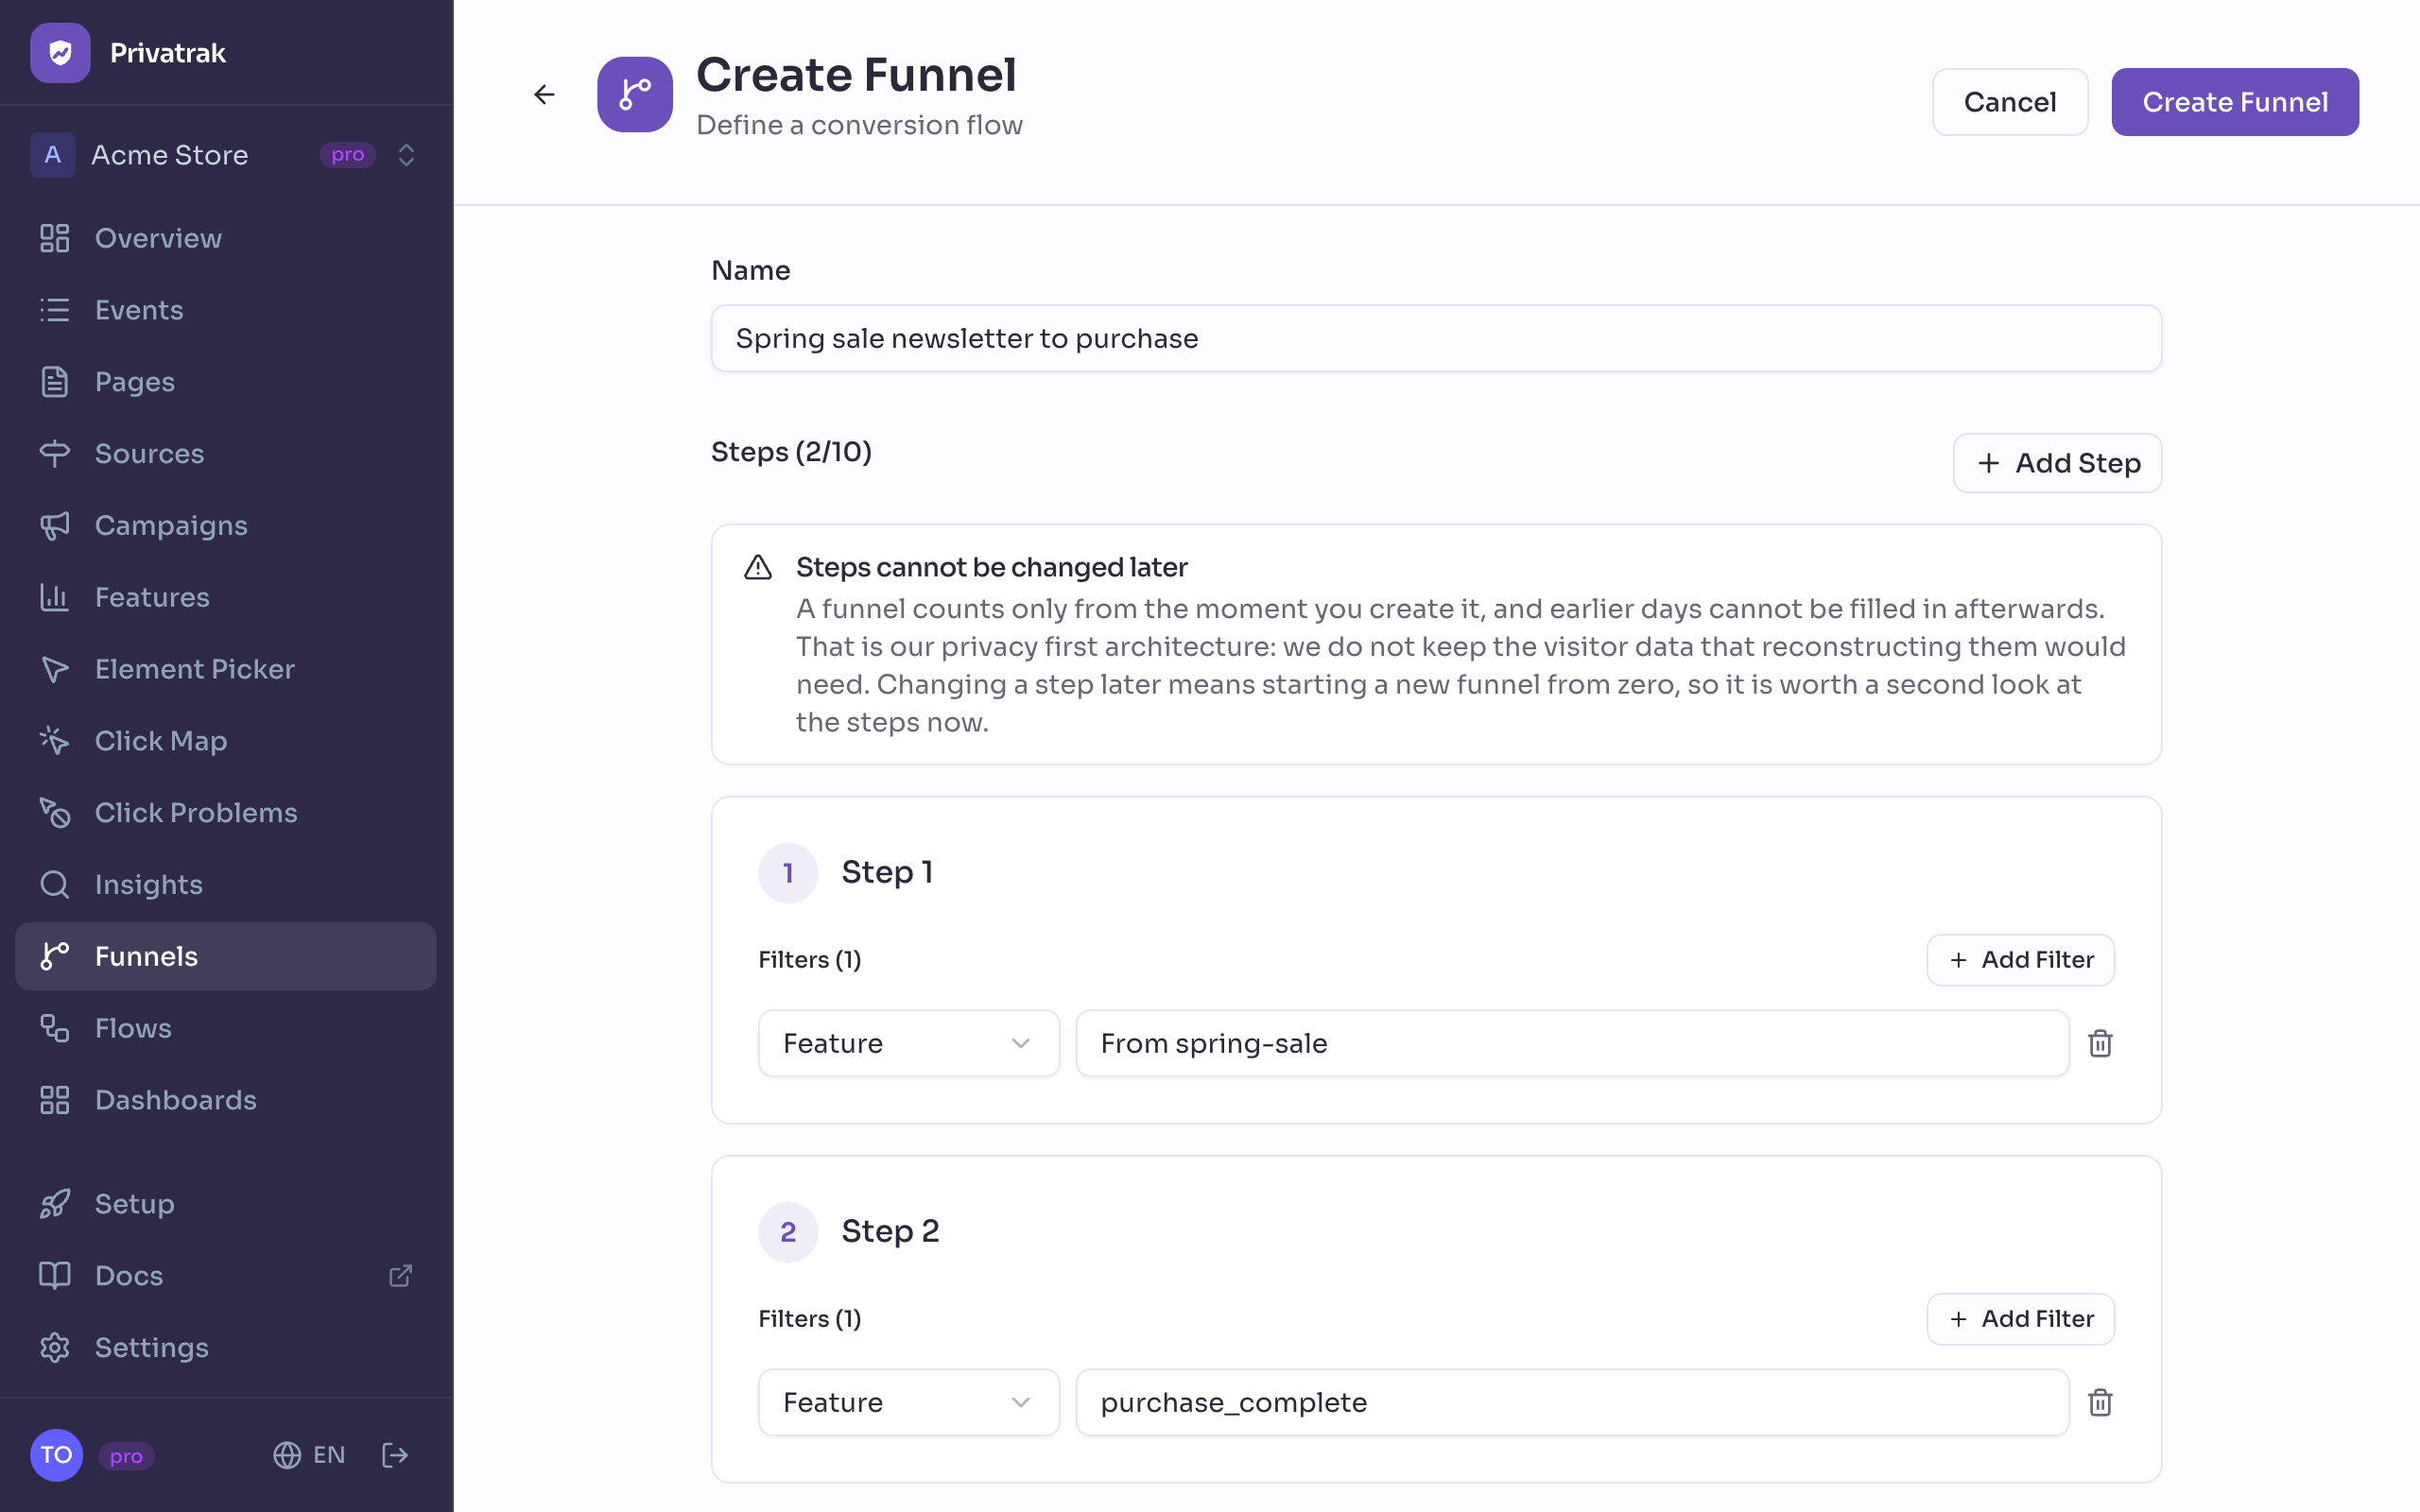
A funnel’s steps can’t be changed later, so check them before you save. Funnels explains every kind of step.
5. Send the link
Put each link behind the button or text it was made for. Then send your newsletter as usual. Nothing else changes on your website.
6. Read the campaign results
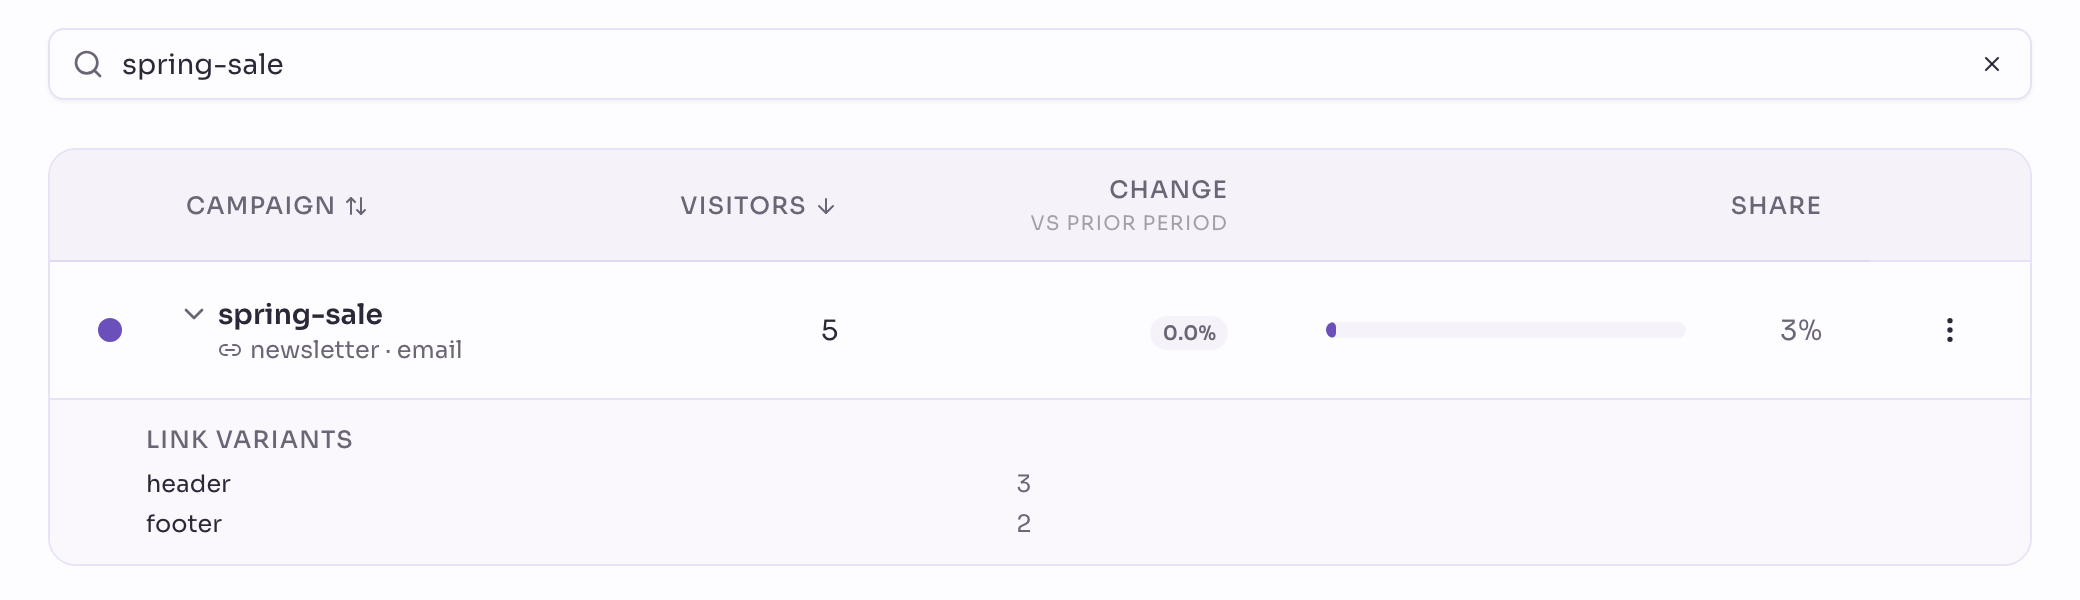
Open Campaigns. The campaign appears as soon as the first visitor arrives: spring-sale, with newsletter · email below it. Expand the row to see how many visitors each link variant brought.
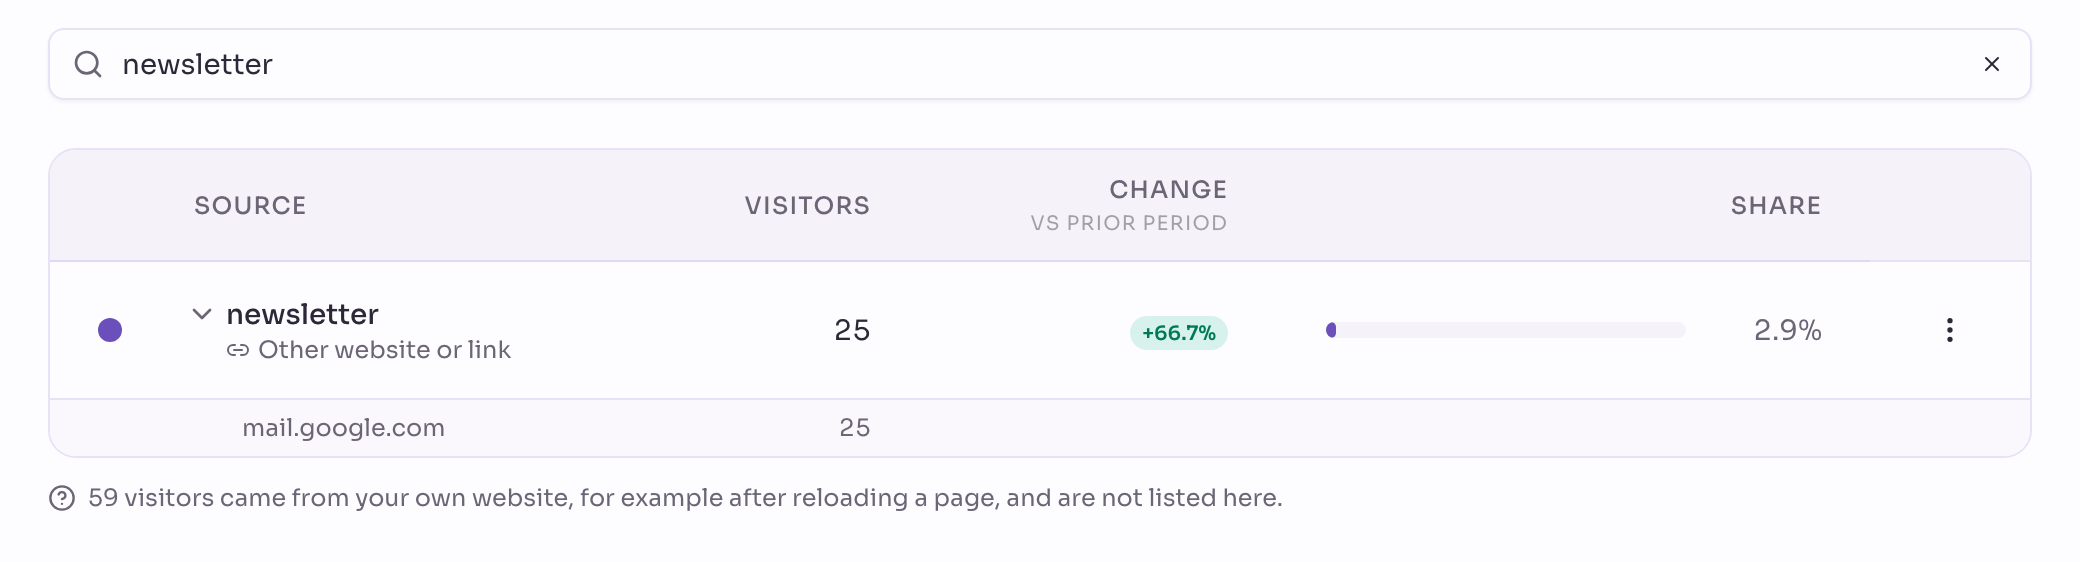
On Sources, every visitor from your newsletter counts under newsletter, whichever campaign brought them. So this number can be higher than the one for a single campaign. Next to it you see Google, LinkedIn and all your other sources, so you can compare the newsletter with them.
On the funnel, the first step shows how many visitors came through the campaign. The last step shows how many of them bought something. The conversion rate between them tells you how many newsletter readers end up buying.
What to expect
- A visitor counts once a day. Two clicks on the newsletter on the same day make one visitor. A click on Monday and another on Tuesday count on both days.
- The first page of the day decides the source. A visitor who came from Google in the morning counts for Google that day, even if they click the newsletter later. The funnel still sees that newsletter visit, so its first step can be a little higher than the number on Campaigns. How sources are counted explains the rule.
- The funnel counts purchases on the day of the click. A visitor who reads the newsletter on Monday and buys on Wednesday doesn’t count as a purchase.
- A new campaign shows New in the Change column. The previous period had no visitors from it. To compare, look at the row of your last newsletter.